I can’t believe summer is coming to an end and I have to share my son with someone else… no one prepares a new mom for sending her precious first child off to school, knowing he’ll never be fully yours again. I was the one who held him when he cried and cuddled him when he needed it; will his new teacher be as comforting? Will he know how much I miss him while he’s gone and know his new adventure is part of growing up? Why didn’t anyone prepare me for the emotions that come with sending their firstborn into the big world?? I can’t believe he’s leaving for college already! Ohhhhkay, that’s a little dramatic as he’s only starting preschool but I’ll be the one crying on his first day, I’m sure! LOL
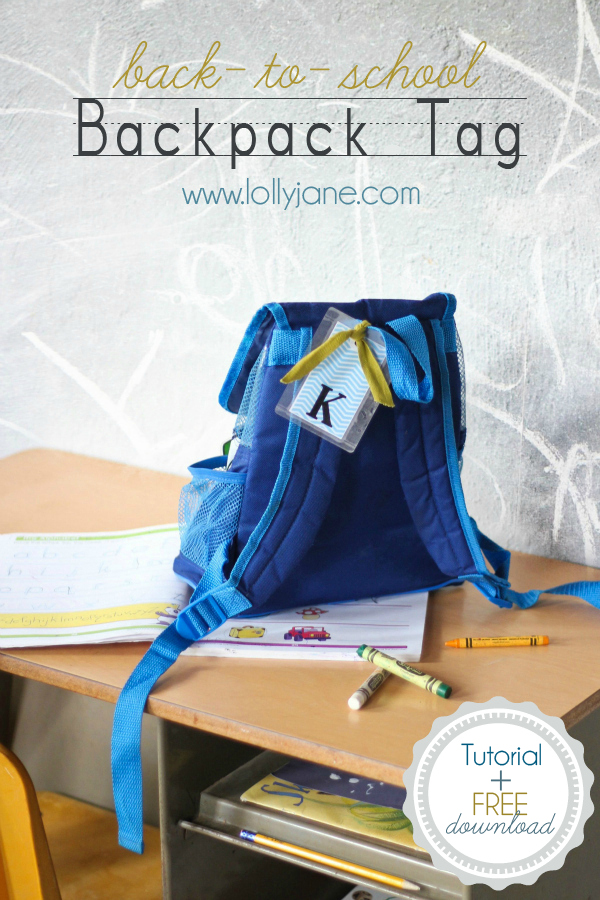
Since I’m new to how this all works, I wanted to be sure that my 3-year old will be prepared to find his backpack if it’s ever lost so I whipped up a tag for him to tie onto his little backpack:
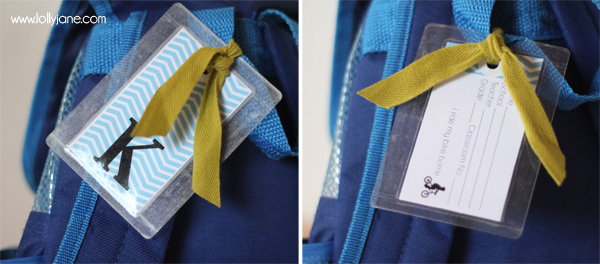
I’ve seen some cute backpack tags made from luggage tags but a lot of them have too much personal information on them (like an address or phone number) and since he’s not taking any major classes with expensive equipment, I just want to ensure his beloved Buzz Lightyear backpack makes it back to his classroom. I put together up a backpack tag that you can easily make yourself with just a few supplies.
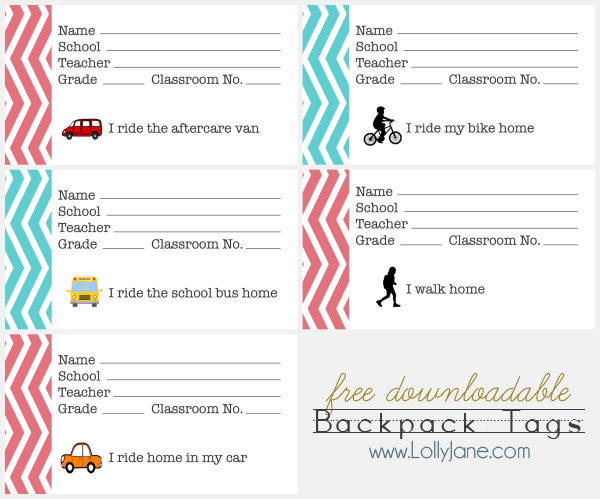
Here’s a peek at the tags you can download for free, available in coral or aqua chevron. You choose your letter (blank fronts also available) on one side and select the back of the tag, depending on how your child gets home from school. (I worked in the schools for several years before landing my dream job -SAHM- and the kids who had labels on their schoolbags sure made it easy for us to direct them to the appropriate line when the last bell rang.)
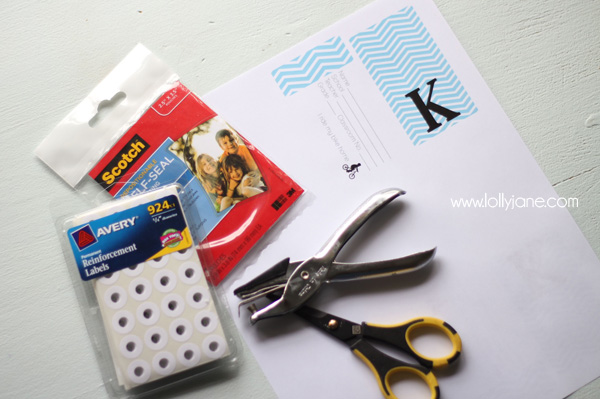
You’ll need a 2×5″x3.5″ self-seal laminating pouch, 2 circle reinforcement labels, a business card size printable (courtesy of us!) a pair of scissors and hole punch. Easy so far, right? (;
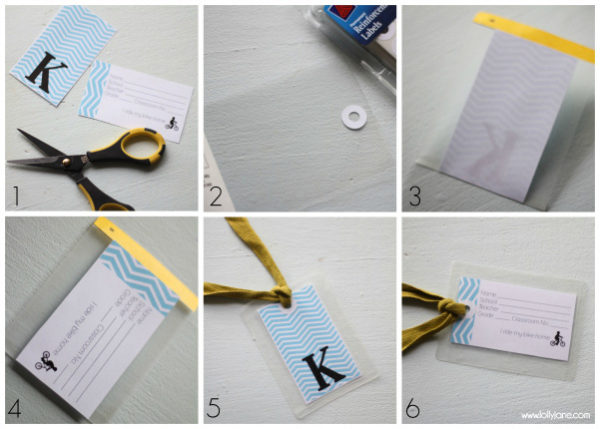
It was a snap to put together, I promise!
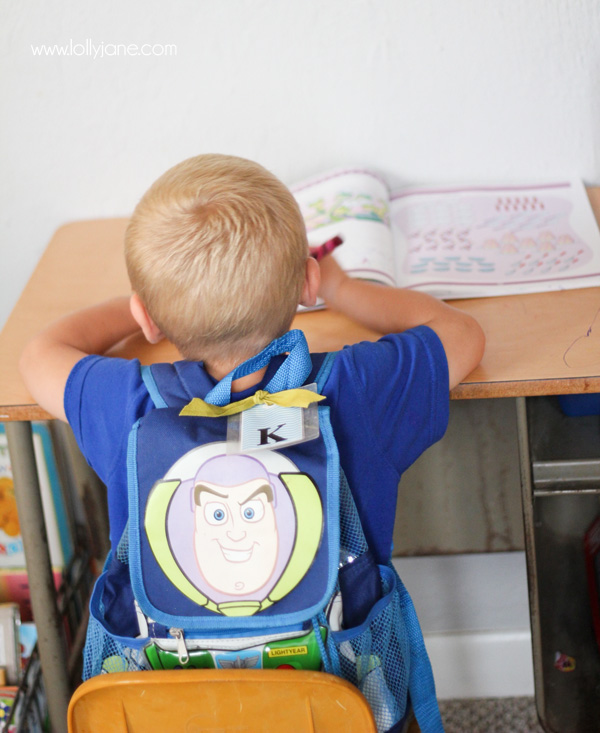
My little guy doesn’t start school for another 2 weeks but is darn excited to wear his backpack with “special thing” already! I snapped a quick shot of him practicing tracing letters in a preschool coloring book sportin’ his new backpack tag.
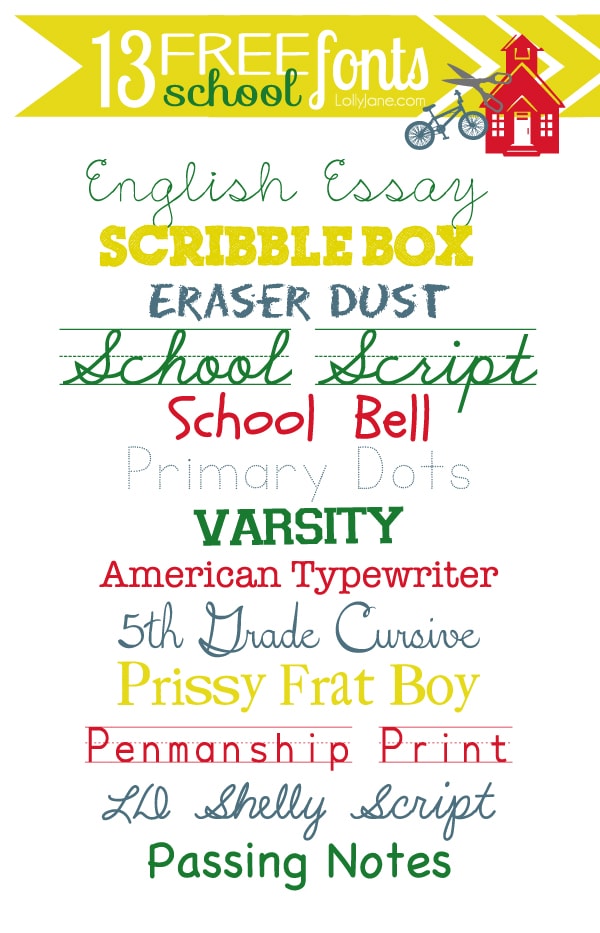
Check out the back-to-school fonts we used for these printables:
Sure hope you enjoy these backpack tags! We’d sure appreciate a “pin” as a thank you for the FREE printable! (;